ERN ReCONNET
CPMS
Clinical Patient Management System
Guides to the CPMS
 Here you can find the guides to request access to the CPMS, to the CPMS dashboard, to setup your ERN Preferences, to adjust CPMS notifications, to create a new Panel and to participate to a Panel.
In addition, to facilitate the dissemination of this important content, ERN ReCONNET has translated the CPMS description in 24 different languages, such as: BULGARIAN, CROATIAN, CZECH, DANISH, DUTCH, ENGLISH, ESTONIAN, FINNISH, FRENCH, GERMAN, GREEK, HUNGARIAN, IRISH, ITALIAN, LATVIAN, LITHUANIAN, MALTESE, POLISH, PORTUGUESE, ROMANIAN, SLOVAKIAN, SLOVENIAN, SPANISH, and SWEDISH.
More info, videos, and details about CPMS can be found here.

How to request access to the CPMS (Members and Affiliated Partners)
How to request access to the CPMS
In order to access CPMS, the following steps need to be followed:
1. Have or create your personal EU LOGIN; Official guide here
2. Add your mobile phone number to EU Login as double authentication method; Official guide here
3. Request access to the CPMS for ERN ReCONNET with specific ROLE;
4. Login into the CPMS.
A detailed video-guide can also be found at the following link: CPMS Video animation guide.
In this guide we will present the steps needed to request access to the CPMS if you are a Full Member or an Affiliated Partner.
In order to create an EU Login, please follow the steps below:
1. Go to the following Link https://webgate.ec.europa.eu/cas/eim/external/register.cgi
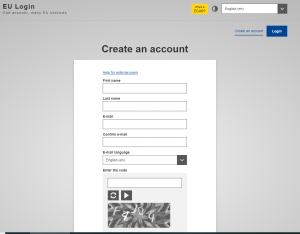
2. Fill the information in the form then click the button “create an account” at the end of the form and wait for the confirmation email.
How to add your mobile phone number as Double factor authentication for EU Login
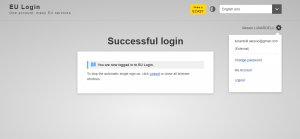 In order to use CPMS, you need to have an EU Login with Double factor authentication process.
1. Go to the following Link https://webgate.ec.europa.eu/cas and Login with your EU Login account.
2. After the Login, click on the icon “![]() ”on the top right and select “My Account”.
”on the top right and select “My Account”.
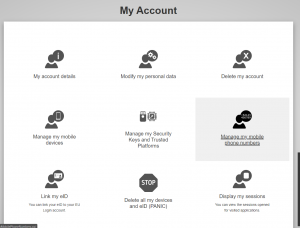
3. Then click “Manage my mobile phone numbers”.
4. Add your mobile phone.
5. Once you have completed the form, you will receive a message via SMS and your mobile number will be associated with your EU Login account. Everytime you will access the CPMS, you will be requested to add your password and a one-time verification code that will be sent to your mobile.
You can also download the EU Login Mobile App via your app store in your mobile and use SCAN QR CODE to secure login with EU Login.
For more information on the two-factor authentication, please refer to official EU Guide.
How to request access to CPMS
In order to request access to CPMS follow the steps below:
1. Go to the following link https://cpms.ern-net.eu/login/
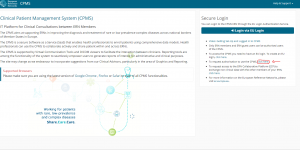 2. Click the link on the right “To request authorisation to use CPMS”.
3. Login with your EU Login.
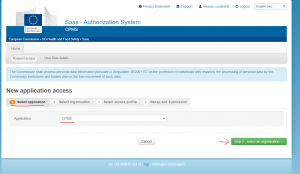 4. In the first step “Select application”, select CPMS then click Step 2.
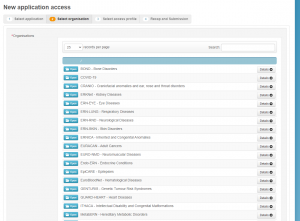 5. In “Select organisation” step, search the Institution you are part of. You can scroll or search with “Search text box” then press Enter on the Keyboard to search. If you are not part of any ERN and you wish to participate or create a panel using CPMS, we encourage you to ask assistance via helpdesk email at helpdesk.reconnet@ao-pisa.toscana.it
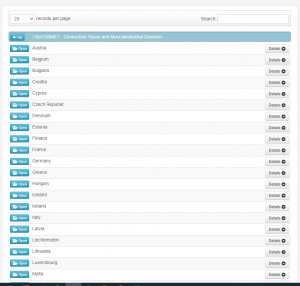 6. After selecting the ERN, you need to choose your nation.
7. In this step, you need to select your organisation. In this example AOU Pisana is shown. After the selection, click on Step 3 button to continue.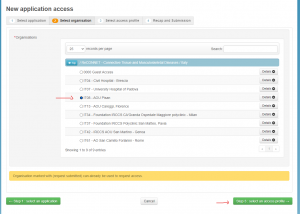
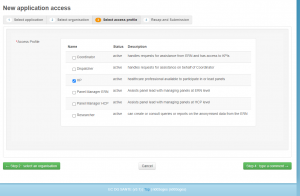 8. In this step you must select the ROLE you want inside CPMS application. Typically, you want to select only HP (Healthcare Provider). Other roles are used for administration purpose or data analysis.
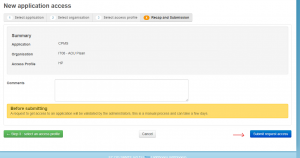 Review the compiled request then click “Submit request access”.
After that, you have to wait for an administrator to review and accept your authorisation. You will be notified via email once the approval process is completed.

How to request access to the CPMS (Guest Users)
How to request access to the CPMS
In order to access CPMS, the following steps need to be followed:
1. Have or create your personal EU LOGIN; Official guide here
2. Add your mobile phone number to EU Login as double authentication method; Official guide here
3. Request access to the CPMS for ERN ReCONNET with specific ROLE;
4. Login into the CPMS.
A detailed video-guide can also be found at the following link: CPMS Video animation guide.
In this guide we will present the steps needed to request access to the CPMS for a Guest User.
You can use the Guest User account to contribute to a Panel as well as to create a new panel.
Please note that the Guest User is a temporary account.
If you haven’t done so yet, we encourage you to contact helpdesk helpdesk.reconnet@ao-pisa.toscana.it or ERN ReCONNET directly ern.reconnet@ao-pisa.toscana.it to assist the process.
How to create an EU Login
I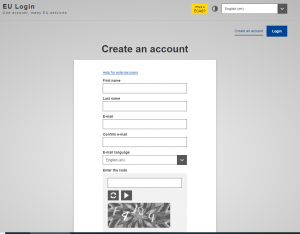 n order to create an EU Login, please follow the steps below:
1. Go to the following Link https://webgate.ec.europa.eu/cas/eim/external/register.cgi
2. Fill the information in the form then click the button “create an account” at the end of the form and wait for the confirmation email.
How to add your mobile phone number as Double factor authentication for EU Login
In order to use CPMS, you need to have an EU Login with Double factor authentication process.
1. Go to the following Link https://webgate.ec.europa.eu/cas and Login with your EU Login account.
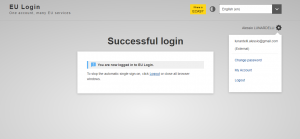 2. After the Login, click on the icon “
![]() ”on the top right and select “My Account”.
”on the top right and select “My Account”.
3. Then click “Manage my mobile phone numbers”.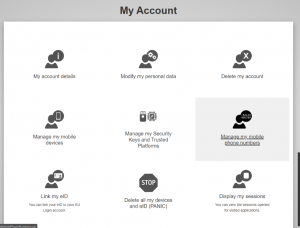
4. Add your mobile phone.
5. Once you have completed the form, you will receive a message via SMS and your mobile number will be associated with your EU Login account. Everytime you will access the CPMS, you will be requested to add your password and a one-time verification code that will be sent to your mobile.
You can also download the EU Login Mobile App via your app store in your mobile and use SCAN QR CODE to secure login with EU Login.
For more information on the two-factor authentication, please refer to official EU Guide https://europa.eu/regions-and-cities/set-eu-login-two-factor-authentication_en
How to request access to CPMS
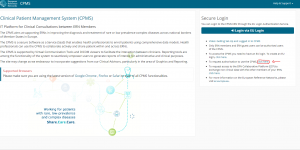 In order to request access to CPMS follow the steps below:
1. Go to the following link https://cpms.ern-net.eu/login/
2. Click the link on the right “To request authorisation to use CPMS”.
3. Login with your EU Login.
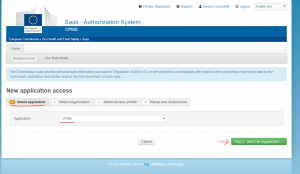 4. In the first step “select application”, select CPMS then click “Step 2”.
5. In “Select organisation” step, search the Institution you are part of. 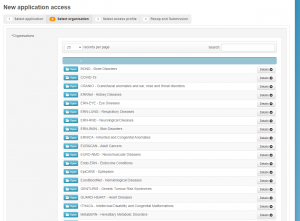 You can scroll or search with “Search text box” then press Enter on the Keyboard to search. If you are not part of any ERN and you wish to participate or create a panel using CPMS, we encourage you to ask assistance via helpdesk email at helpdesk.reconnet@ao-pisa.toscana.it
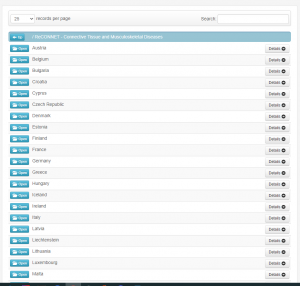 6. After selecting the ERN, you need to choose your nation.
7. In this step, you need to select 0000 Guest Access.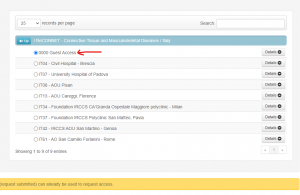
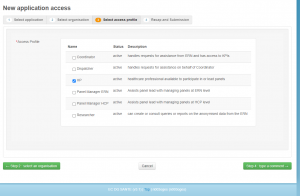 8. In this step you must select the ROLE you want inside CPMS application. Typically, you want to select only HP (Healthcare Provider). Other roles are used for administration purpose or data analysis.
Review the compiled request then click Submit request access.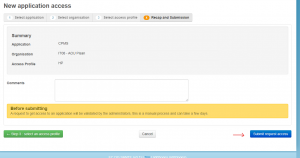
After that you have to wait for an administrator to review and accept your authorisation. You will be notified via email once the approval process is completed.
We encourage you to contact helpdesk helpdesk.reconnet@ao-pisa.toscana.it or ERN ReCONNET directly ern.reconnet@ao-pisa.toscana.it to assist the process.

Overview of the CPMS Dashboard
Overview of the CPMS Dashboard
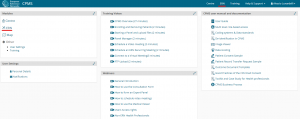
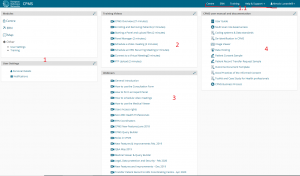 Once you login into CPMS via EU Login at link https://cpms.ern-net.eu/login/, you will see this screen:
1. This is the area you select if you want to check panels of your Center or of the entire ERN Network. From this area, you can also go to your personal user settings such as email, name or tweak email notifications.
1.1 Menu for quick access to the most used area of the CPMS
2. Pre-recorded quick training videos on how to use specific functions of CPMS
3. Past webinars for CPMS for more in-depth discussions about the application.
4. Technical documentations for CPMS.

How to setup your ERN Preferences
How to setup your ERN Preferences
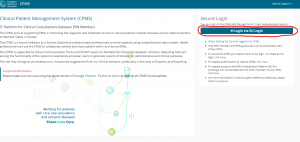 In order for other members to invite you in a panel as specialist for a particular disease, you need to select your field(s) of expertise.
1. Go to the following link https://cpms.ern-net.eu/login/
2. Click the button “Login via EU Login” then use your EU login credentials
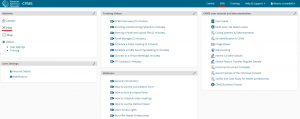 3. Go to “ ERN” section of the application
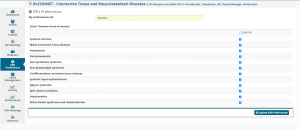
5. Now you can select which Thematic Area of Interest and add your professional Role.
In this way, when other users of the CPMS send the invitations to join a panel, the system will suggest them to invite specialists that have selected the disease needed for their panel.

How to adjust the CPMS Notifications
How to adjust the CPMS Notifications
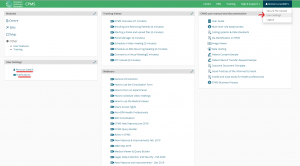 The CPMS sends out different types of notifications and it is possible to personalise which notifications you receive.
You can adjust your preferences on email notifications after logging in the CPMS by going in the notification preference section of CPMS by either clicking on the top right menu with your name and click user settings or from the main page of CPMS clicking directly notification.
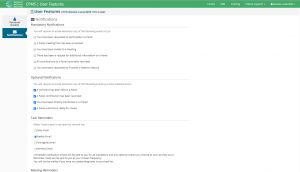 Here you can adjust the notifications according to your preferences.

How to create a new Panel
In order to create a new Panel and request the discussion of the clinical case, you will have to enrol a new patient.
How to enrol a new patient
1. Login into CPMS at the following link using your EU Login account https://cpms.ern-net.eu/login/.
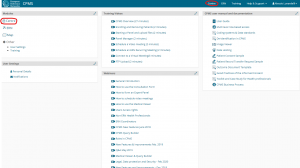 2. Go to “Center” either using the quick menu or via homepage link:
3. Click on enrol a patient.

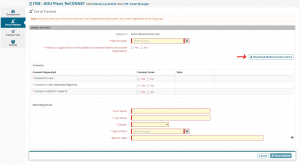 4. Fill the patient information and remember to download and provide the patient with the Consent Forms (the consent form are available in different EU languages).
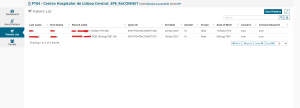 5. Once all the clinical information is included in the forms, click on the bottom button Enrol Patient to save the patient.
6. Now the patient is added in the patient list of your centre and you can request a consultation via the CPMS.
How to create a new Panel
1. Login into CPMS at link https://cpms.ern-net.eu/login/ using your EU Login
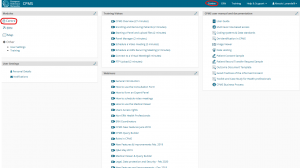 2. Go to your Center either using the quick menu or via homepage link:
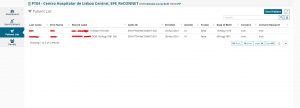
4. Once clicked you will see the list of all patient of your ERN Centre.
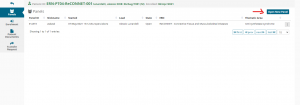
5. Clicking on each patient, you will see all the panels created for that patient and you can also create a new panel by clicking “open new panel”.
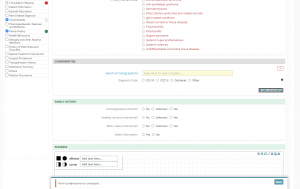
6. By clicking on “Open New Panel” you will see this screen.
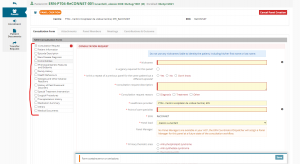
On the left you have optional additional information section you can click to add for the panel (i.e. comorbidities or Family history) and on the right the form for entering the basic information for the panel plus the eventual additional optional section.
Panel Overview
Once you open a panel (create or get invited) you will see this screen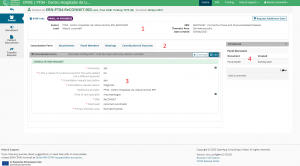
1. General information about the panel
2. Navigation menu’ to navigate the different panel sections.
3. Content area where a section is displayed according to your navigation (via navigation menu’)
4. Timeline of the panel where you see all invitation, participants comments and state of the panel.
Panel – How to invite members
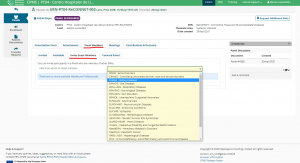
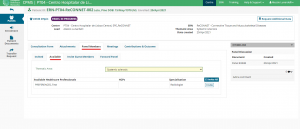
In the panel member section, you can see and invite members to participate in a panel.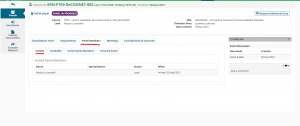
Panel members section has 4 different sub sections:
1. Invited – display all members invited to a panel.
2. Available – See all member available to invite from within you ERN.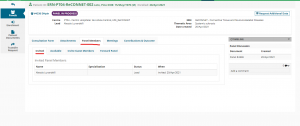
3. Invite guest members: invite members from a different ERN to participate in the panel. Selecting first the ERN then members and invite as guest.
4. Forward panel: The CPMS allows to forward a panel to a different ERN.
We encourage you if this is the case to contact first the helpdesk via email helpdesk.reconnet@ao-pisa.toscana.it or directly the ERN ReCONNET at ern.reconnet@ao-pisa.toscana.it.
How to create a Panel – Attachments
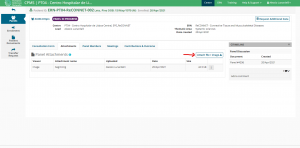
In the attachments section you can see all files uploaded to a panel and by clicking on “attach file / image” button you can upload a new file to a panel.
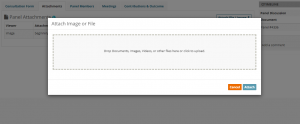
Once the modal window opens, you can drag and drop files from your computer folder directly on it to upload them to the panel attachments list.
How to set up Meetings
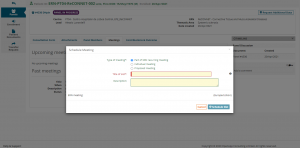
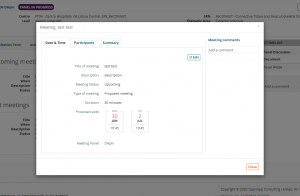
The CPMS allows you to organise a meeting in order to discuss your clinical case via the web-conferencing tool integrated with the CPMS.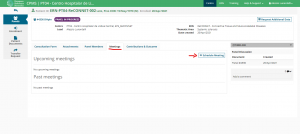
In the meeting section you can see all scheduled meetings and schedule new meetings. You can schedule 3 different types of meetings:
1. ERN recurring meeting: schedule a recurring meeting with invited members.
2. Individual meeting for a specific time slot with invited members.
3. Proposed meeting: propose different time slots available for the meeting, so invited members can choose the best timeslot for themselves.
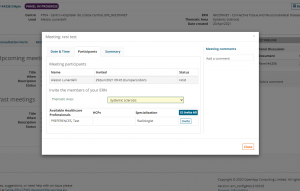
Once you create the meeting you can then invite members from Participants section and leave comments also for the meeting.
You can also use the Summary section to write a summary for the meeting.
Contributions and Outcome
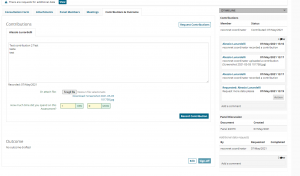
In the contributions and outcome you can write your contribution to the panel along with attaching files for your contribution.
Once the panel members reach to a conclusion the panel manager can write a general Outcome for the panel editing the panel outcome section. This will leave a summary for the closed panel for future reference.

How to participate to a panel
1. Login into CPMS at link https://cpms.ern-net.eu/login/ using your EU Login.
2. Go to the ERN section section either using the quick menu or via homepage link:
3. Once in the ERN section you will see the invitations in 2 different places. In Panel invitation and in Member Tasklist.
4. Once you click on the panel you will get prompted if you want to join the panel.
5. After clicking “yes”, the system will automatically include you as a member of that particular panel and you will be able to consult the information of the case and provide your contribution to the panel.
Downloadable guides

DOWNLOADABLE
PDFs

PDFs

